Contact forms in Facebook Ads – how can customers contact your company?

Statistically, nearly 40% of the world’s population uses Facebook a minimum of once a month, and one in four people worldwide do so daily. This shows the huge potential of Facebook to reach a well-defined audience. This allows companies to successfully profile ads and create campaigns in a dedicated tool – Facebook Ads. Check out how you can set up a contact form in Facebook Ads and what the benefits will be!
Facebook Ads – a few words about the tool
We will start the entry rather unusually – the classic convention of the text dictates that we introduce the product, focus on the selected functionality, and finally list the advantages of the solution. Here we will reverse the order slightly and first answer the question “why is it worth it?” and then move on to “how to do it?”. Facebook Ads – as it is referred to – is a tool for company profiles and fanpages to promote on Facebook. It is a very good tool that creates a huge number of possibilities, and among the advantages, the most important ones should be pointed out:
- Largest online community – Facebook has nearly 2 billion daily visitors, making it the largest social media platform;
- Low entry threshold – a budget of as little as $14 per day is enough to start a marketing campaign;
- Direct control over the marketing campaign and its effects – you get all the results in the form of clear statistics;
- Possibility of strict audience profiling – we determine to whom the ad will appear based on age, gender, location or interests;
- Direct user interaction option – Facebook Ads allow users to interact with the page and leave a contact form.
The latter advantage directly translates into sales results. The ability to leave a contact form acts like an open door at a stationary establishment. This is also a sign of a hot, or at least warm, lead, against which we should take immediate action. With just three simple steps, your Facebook Ads will be equipped with a fully functional contact form.

How to get started with Facebook Ads?
In order for Facebook Ads to face us, it is necessary to create a company profile on the Facebook page. We can do this from registering a new account or adding a page to a private profile. It should be mentioned that the personal account itself will not support advertising functionality. Shortly after setting up the site, a bar titled “Professional Tools” will appear on the left side of the screen in the desktop version. In it, we have three options to choose from – “Ad Center” (useful after publishing an ad), “Create Ad” (to start promotional activities) and “Create Automated Ads” (useful rather for a marketing campaign). In order to access these functionalities from a mobile device, it is necessary to install the Business Suite app (blue pie chart icon with a cutout on a white background). By selecting the “Create Ad” option, we start the activity in Facebook Ads.
Facebook Ads Policy
If you haven’t had the opportunity to create Facebook ads before, the platform will show you a message related to the internal policy. It relates to anti-discrimination, that is, taking marketing activities in a way that could exclude certain individuals or groups. Of course, no one is going to block the advertising of halal products as being aimed only at Muslims or ban the promotion of eyeglasses under the pretext of insulting blind people. Rather, the administrators are concerned here with the unjustified valuing of the recipient, such as the creation of a cafe “for heterosexual couples only” or a barber shop promoting itself with a signboard saying “no women allowed.” Let’s take this warning seriously – overlooking common decency, Facebook will have no reluctance to block our advertising (without refunding the funds), and in extreme cases even block our profile. This rule applies not only to text, but also to graphic content or dialogue in a video clip.

Step 1 – Create an ad and configure the target
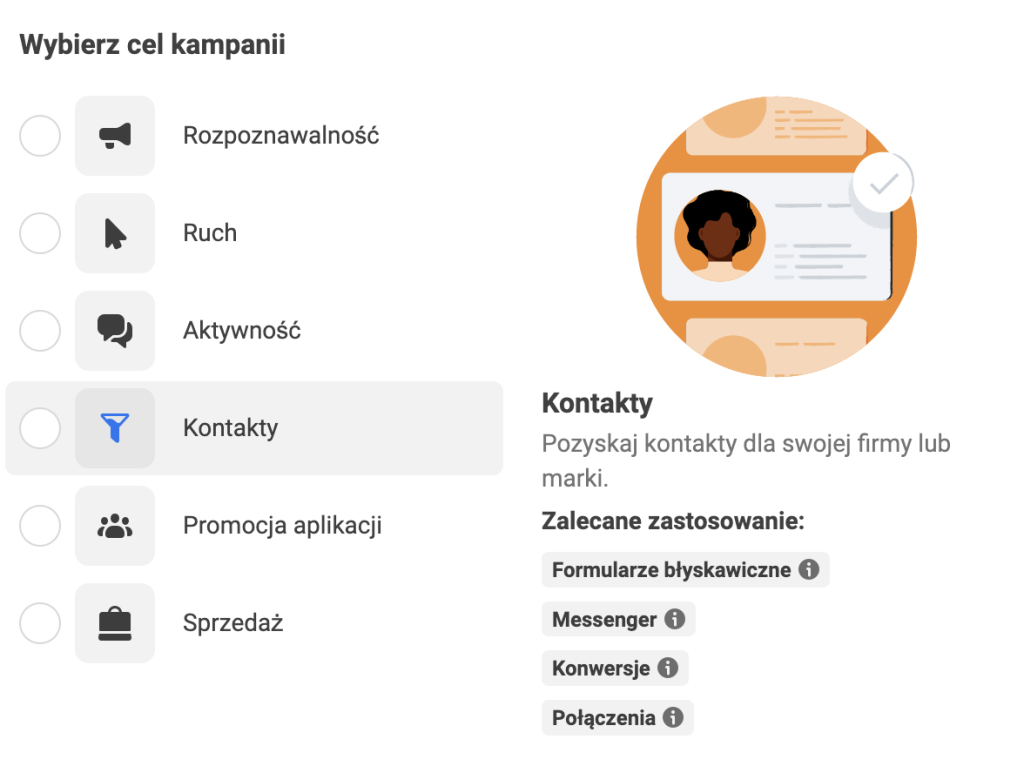
After accepting the platform’s policy, we can start creating Facebook Ads. We will be taken to a menu that looks exactly like the screenshot below. The default settings assume an automatic ad format with material in the form of a profile description. Graphics, on the other hand, are pulled from the background photo, which is your profile’s banner ad. This is not a bad solution, as long as we only want to introduce ourselves to the wider community and not have in-depth profits from it. If we want to enter forms and thus acquire leads, it is necessary to change the goal from “Automatically” (first option) to “Acquire more contacts” (second option). Just to be sure – underneath the goal should be the light gray text “Use the form to collect contact information from potential customers.” Selecting this option will cause a light blue button with the keyword “Create form” to appear below the description and graphics field.

Step 2 – Create and configure the contact form
After clicking on the “Create Form” button, we will be presented with a panel for managing our forms. If we have previously created forms, there will be an option to load previous designs. Since we have not created a form from our profile before, we automatically proceed to create a new draft. The quintessential part of what we do is to get information about a potential customer. Think about what you will really need – if you are running a car buying business, basic contact information will suffice. If, on the other hand, you offer sports massage services with travel to the client, it would also be good to know the postal address, optional date of birth and gender. Here Facebook suggests a few things to complete within the form:
- First and last name (information automatically selected, it cannot be unselected);
- Phone number;
- Email address;
- Mailing Address;
- Date of birth;
- Gender;
- Position;
- Company name;
In addition, it is possible to configure your own questions with a short answer. To do so, click on the gray “Add Question +” button . At the very end, there is an option to add a privacy policy, or RODO clause. This one already has to be included as an external link – a reference to your website or document in which the full content of the clause is included. Don’t be in a hurry to configure the form – it’s a key element of your Google Ads, so it’s worth spending the extra few minutes, but be sure to create everything according to our concept.


Step 3 – Tailor the ad to the audience
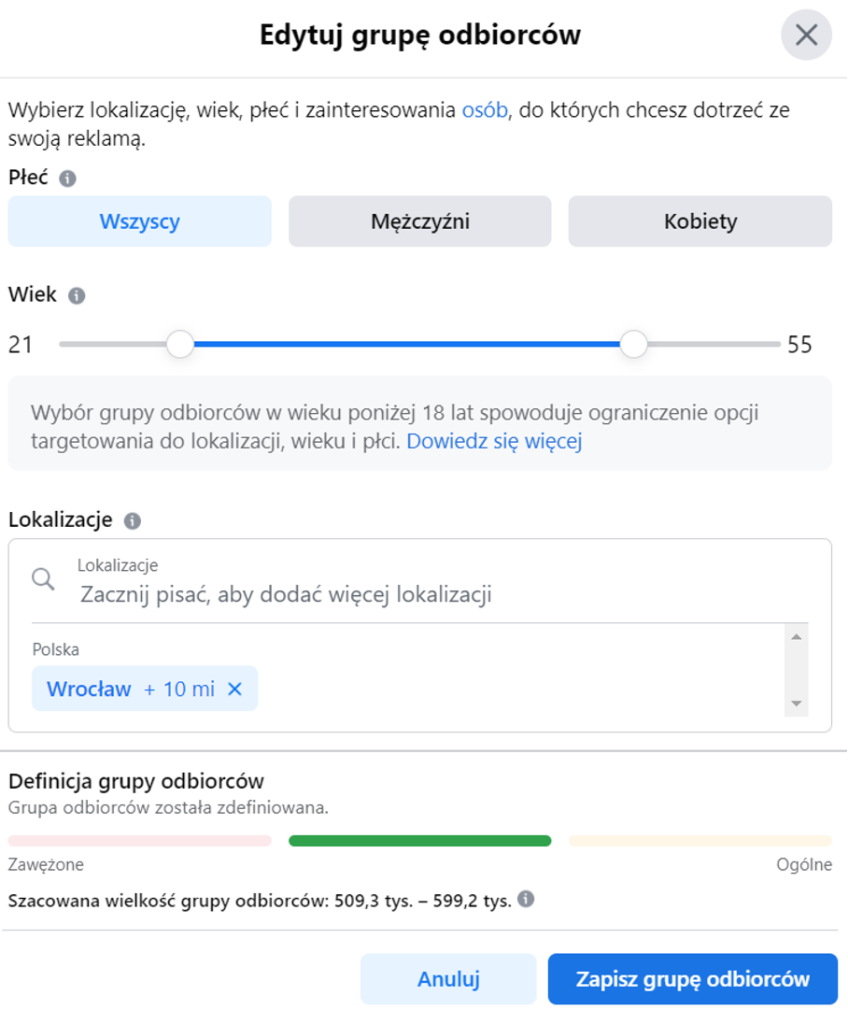
You already have the form, now it remains to determine who should see it in the first place. By matching your ad to your target, you can make your sales efforts even more effective. What would be the point of advertising an auto buy from Wroclaw in Szczecin, Bydgoszcz or Bialystok? Why would you target an ad for spa stays in Ciechocinek to an audience of 18-30 year olds? Let’s face it – this way you could “burn through” the budget. And why should you, when Facebook Ads gives you the ability to configure your target audience very precisely? It is better to slightly reduce the audience and instead increase the radius of the ad display. Optionally, with the money you save, you can buy a longer campaign that will display for not 21, but 28 days. The final choice is left up to you, of course, but remember to make the most of every zloty in your budget.

Analysis of Facebook Ads activities and results
Preparing a good advertisement is quite a challenge and, importantly, not the end of your work. The trick is not to lay out tens of thousands of zlotys for mass marketing; the trick is to conduct it in such a way as to use the full potential of the tool with a limited budget. And the potential is definitely not lacking in Facebook Ads, especially when we talk about contact forms. We can already see the detailed data related to a particular advertisement while running the activity. The system will show us information about what type of interaction was made (e.g., display, click on a post, enter a page, submit a form), what audience the ad reached, and whether the so-called “click-through” was returned. Negative feedback (e.g., how many people hid the post). Observing the results and drawing correct conclusions will bring additional benefits related to maximizing advertising effects.
Contact forms in Facebook Ads
Contact forms are one of the methods of collecting contacts to potential customers as part of the defined goals of the marketing campaign we launch on the site.

Contacts collected using the form are stored in the Contact Center of the Meta Business Suite account by default. In practice, campaign managers or other authorized persons must constantly check whether new leads have been received and pass them on to the sales department, which handles the “processing” of such inquiries.
Export Facebook contacts to CRM system
In SalesWizard, we implemented integration with Facebook Ads contact forms – all requests are sent directly from Facebook to the CRM system. You can read more about SalesWizard’s integration with Facebook Ads, as well as Google Ads, WordPress and HTML here.
